Featuring guest authors; crafting tips and projects; recipes from food editor and sleuthing sidekick Cloris McWerther; and decorating, travel, fashion, health, beauty, and finance tips from the rest of the American Woman editors.

Note: This site uses Amazon affiliate links. As an Amazon Associate, I earn from qualifying purchases.
Showing posts with label kids crafts. Show all posts

Sunday, April 12, 2020

#CRAFTS WITH ANASTASIA--KEEPING KIDS BUSY WHILE STUCK AT HOME

Life has certainly thrown us a curveball. Most of the country is stuck at home, and we have no idea how long our isolation will last. We know it’s for the greater good, but if you have children, you’re probably at your wit’s end right about now and giving in to way too much screen time.

As for me, I’ve had to pause Anastasia’s latest adventure midway through writing it to help care for grandchildren while their parents work from home. Luckily, I have a LOT of crafts supplies. We’ve spent one afternoon making bead bracelets and necklaces and another playing with pompoms. Sure, you can glue pompoms together to make pompom animals, but there’s nothing like a pompom fight!


We’ve also gone old-school with things like bubbles.


Recently Beth Schmelzer sent me some links that I wanted to share with all my readers to help you cope with the restrictions of Covid-19, especially if you have children. For those of you with grandchildren, you might want to pass this post along to your children. I’m sure they’ll appreciate it. Beth says she finds inspirations in these sites. I hope you’ll find them helpful.

Penguin Random House sponsors the readbrightly.com site where you can find books and activities for different age groups. They sometimes include giveaways. There are also videos where books are read aloud.

WhatDoWeDoAllDay? is a blog by a mom of two boys. The site includes books, crafts, games, and other activities to keep children of all ages and interest levels "unplugged."

The Imagination Soup website is organized by age, grade and topic, listing books, games and toys. The theme of the blog is Raising Kids Who Love To Read.  

For those times when you don’t mind your kids having a bit of screen time, check out these free kids’ movies being offered by Amazon. And Audible is allowing kids to listen to a selection of audio books for free. 

If you know of any other sites with fun things to do while we’re all stuck at home, please share by posting a comment.

Finally, a little musical interlude…if like me, you’ve always loved “Sweet Caroline,” check out this new Covid-19 version by Neil Diamond. 

Sunday, December 9, 2018

#CRAFTS WITH ANASTASIA--METALLIC BRAID ORNAMENT

Need a last minute gift for a holiday open house or Secret Santa? Nothing could be quicker than this Metallic Braid Ornament. Make several in a variety of colors and wrap them up in a festive holiday basket.

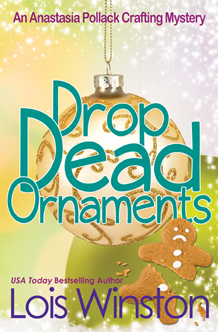
And don’t forget to check out Drop Dead Ornaments, the latest Anastasia Pollack Crafting Mystery. You’ll find lots more quick and easy ornaments to make.

Metallic Braid Ornament

Materials
Clear glass ball ornament*
5-yds. 5mm braided metallic cording (choose silver, gold, or 2-toned combination colors such as red/gold or black/silver)
9”-12” of 1/4”-1/2” wide satin or grosgrain ribbon in a complementary color

Note: If you can’t find 5mm braid, you can substitute a different diameter. You’ll need less braid for a thicker diameter and more for a thinner diameter braid. You can also substitute yarn, twine, thin braid, or a thin strip of fabric for the ribbon used for the hanging loop.

Carefully remove the metal cap from the glass ball. Feed the metallic braid through the opening into the ornament. Reattach the metal cap. Tie the ribbon through the loop for hanging.

* This is a great project to make with kids, but depending on their age, you might want to substitute clear plastic ball ornaments for the glass ball ornaments.

Drop Dead Ornaments
An Anastasia Pollack Crafting Mystery, Book 7

Anastasia Pollack’s son Alex is dating Sophie Lambert, the new kid in town. For their community service project, the high school seniors have chosen to raise money for the county food bank. Anastasia taps her craft industry contacts to donate materials for the students to make Christmas ornaments they’ll sell at the town’s annual Holiday Crafts Fair.

At the fair Anastasia meets Sophie’s father, Shane Lambert, who strikes her as a man with secrets. She also notices a woman eavesdropping on their conversation. Later that evening when the woman turns up dead, Sophie’s father is arrested for her murder.

Alex and Sophie beg Anastasia to find the real killer, but Anastasia has had her fill of dead bodies. She’s also not convinced of Shane’s innocence. Besides, she’s promised younger son Nick she’ll stop risking her life. But how can she say no to Alex?

Buy Links
Kobo 
Nook 

Sunday, June 24, 2018

#CRAFTS WITH ANASTASIA--RAINY SUMMER DAYS WHEN THE KIDS ARE STUCK IN THE HOUSE, PART 2

Last week we featured a coloring project for littlegirls to do on a rainy summer day. Today we’re offering one for the boys.

Print out this basketball player for the little ones to color with crayons or colored pencils.

Mount the finished drawing on a piece of colored construction paper. If you have pinking shears, trim the edges of the construction paper for a decorative look.

Glue a ribbon to the top back corners for hanging.

For added decoration, glue on assorted colored buttons.

Sunday, June 17, 2018

#CRAFTS WITH ANASTASIA--RAINY DAYS WHEN THE KIDS ARE STUCK IN THE HOUSE

Summertime is a time for enjoying outside activities. But it’s also a time for thunderstorms, and if you have kids at home or grandkids visiting, when a rainy day hits, you need indoor activities. Having some basic craft supplies handy will make for a fun day and keep the kids from being glued to the TV or their various devices.

Here’s a simple project to get you started. Print out this skateboarding, pigtailed girl for the little ones to color with crayons or colored pencils.

Mount the finished drawing on a piece of colored construction paper. If you have pinking shears, trim the edges of the construction paper for a decorative look. Glue a piece of ribbon to the top back corners for hanging.

Glue on buttons, beads, and ribbons for added decoration.

Stop back next Monday for a coloring project for the boys.

Sunday, March 19, 2017

#CRAFTS WITH ANASTASIA--HOW CRAFTING CAN SAVE THE WORLD

March is National Craft Month. I believe that people are born creative. Just watch any baby or toddler exploring his surroundings, and you’ll see what I mean. Unfortunately, most adults start squelching that creativity (Don’t touch!) in their children early on. Eventually that innate creativity is so suppressed that it’s nearly impossible to retrieve. So why are we then surprised when our kids prefer to sit around for hours, staring at a computer monitor or TV screen? 

Solving problems and resolving conflicts require creative thinking. Creativity needs to be nurtured in order that today’s children grow up to become tomorrow’s leaders, but too many outside forces are at work, influencing our children to “color within the lines.” Now think about this: people who color within the lines never learn to think outside the box. It’s that outside the box thinking that finds solutions to the world’s problems.

One of the ways we can help our children continue to grow their creativity is to encourage them to craft, beginning at a very early age. The first step is to have creative materials around the house for children to use. Keep ample supplies of paint, glue, markers, chenille stems, craft sticks, pompoms, and other basic craft materials handy for those “I’m bored; there’s nothing to do” days.

Instead of buying another video game for that next birthday party or special occasion, buy craft kits. Keep a few kits on hand for rainy days, for when your children’s friends spend the night, or just for an impromptu surprise. Encourage children to make gifts for family members’ birthdays, Christmas, Valentine’s Day, etc. instead of buying gifts. Instead of hosting a child's birthday party at Chuckie Cheese, consider a home crafting party or one at your local craft store.

Remember that your children’s efforts don’t have to be perfect. Always praise the attempt and encourage children to continue creating. The act of crafting develops small motor skills and hand/eye coordination. Creativity helps grow our brains. By encouraging your children to craft, you’re giving them an incredible foundation for future endeavors.

All it takes for children to learn to love crafting is an environment in which they can satisfy their creative nature. Nurture that inborn talent, and you’ll help your children grow into creative adults that just might wind up solving many of our planet’s problems.

Sunday, March 12, 2017

#CRAFTS WITH ANASTASIA--GUEST AUTHOR AND CRAFTER TR FISCHER

Author TR Fischer grew up in Colorado. After moving to California and sampling life in San Diego, San Francisco and Los Angeles, she and her husband moved back to the Denver area. That didn’t satisfy, so the city-dwellers bought some land and took up raising buffalo. Each day is an adventure, on and off the page. Learn more about TR and her books at her website.

When my kids were young, I loved creative projects. Every year at Christmas, I bought sweatshirts, ironed on holiday designs and painted them in with fabric paint. And on every special occasion, I kept a camera nearby so I could capture the things I didn’t want to forget. As the kids got older, we had accumulated boxes of photographs.

I attended a party where someone was selling scrapbooking supplies. I didn’t spend much that day but I came home with a plan. I would conquer those boxed photos and create beautiful scrapbooks for my kids. I would document their every achievement in annals worthy of whatever prize one gets for scrapbook artistry.  Wait! Why not get each of them a book of their own and we could do it together. Yes! It would be great fun. I bought paper and pages and all manner of things.

After schlepping myriad supplies from whatever closet I’d stored them in, setting each child up at the dining room table with photos I’d picked out just for them, I waited for the blissful wonderment to descend. I’d imagined us chatting and laughing about the fond memories while we documented them.

Cut to reality:

I flitted from one child to the next, helping them choose a theme, cutting the patterned paper they chose into every shape imaginable. No one was happy with the results and at the end of the session, I felt stressed and exhausted. Surely it would go better the next time. Nope.

I’m not the kind of person who volunteers for painful experiences I can get out of, so I kept taking pictures but gave up on the dream. Maybe one day I would find time to do it myself.

A few years ago, I came to terms with the failure and got over it. I scanned all the photos. Then I stared into the closet filled with paper and stamps. I couldn’t bring myself to throw it all away and knew I’d get nothing if I tried to sell it. I still loved craft projects. I realized nearly everything could be repurposed making greeting cards.

I’m no pro, and I prefer simple designs. Above are several cards I made a few weeks ago. I hope it inspires you to take another look at what you have sitting around and seeing if you can find another purpose for it, something that brings you some joy or pleasure. Most of the time when I send people a handmade card, I get some sort of thank you—a text, a Facebook message or phone call.  They’re touched that I took the time to create something for them.

If you want to try your hand at greeting cards, here are a few things you’ll need to get started:
·   Aileen’s Original Tacky Glue—there are plenty of options, but this is my favorite.
·   Pre-made cards or cardstock you can trim to size. I buy these from craft stores when they’re marked down. Current also sells colored envelopes that are great for birthday cards.
·   Stamps and stamp pads. There are millions to choose from and they’re always on sale somewhere.
·   A good paper cutter with an arm that extends for measuring the paper. I have two—one of which is always in stock at my local Tuesday Morning for $6.99. When the blade gets dull, I just replace the whole cutter.
·   Embellishments of your choosing.

A Few Helpful Tips:
·   I usually choose a theme first and make a few cards that are similar to each other.
·   Cut anything that needs to be cut and lay out your design. Then reverse them and glue them onto the card in the right order.
·   Don’t worry if it’s not perfect. People will appreciate your thoughtfulness.

Feel free to reply with any questions and I’ll respond as soon as I can. I have a greeting card board on Pinterest, too. I’d love to connect with you!

Happy crafting!

A Man Around The House
A mountain of problems and painful memories have Tara Jones in their grip. The moment she graduates, she plans to escape her small town and make a fresh start. On the way to her nursing final, Tara watches in horror as a car crashes in front of her. The driver is the same man who bribed her for a haircut a few days before. The one she can’t stop thinking about.

Bo Michaels is not looking for female entanglements. He’s too busy chasing a real estate deal he believes will catapult his career. After totaling his car, Bo wakes up in the hospital with a metal contraption holding his leg together. No walking, no weight bearing, no nothing—for six weeks. Estranged from his family and having no close friends, Bo turns to Tara for help.

Tara reluctantly agrees to care for Bo in her home. The money she’ll make might enable her to pay off a debt to a frightening man who won’t leave her alone. Neither the nurse nor her patient anticipates the lightning that strikes their hearts. Just as a fragile bond develops between them, the town and shadows from the past threaten to destroy it.

Buy Links

Sunday, November 13, 2016

#CRAFTS WITH ANASTASIA--POMPOM #CHRISTMAS BALL ORNAMENT

Last week we featured directions for an elegant metallic ornament made from ribbon, braids, and trims. If you’re looking for something a bit funkier for your tree, how about a pompom ornament? This ornament can be whipped up in a matter of minutes and is easy enough for kids to make. Just swap out the low-temp glue gun for tacky glue.

Pompom Ornament

Materials:
3” Styrofoam ball
9” length 3/16” ribbon
red, white, and green pompoms in assorted sizes up to 1-1/2” diameter
low-temp glue gun or tacky glue

1. Poke a hole in the top of the Styrofoam ball.

2. Glue cut ends of the ribbon into hole, poking down into ball for hanging loop. Allow to dry.

3. Glue the pompoms randomly around the ball until the entire ball is covered.

Sunday, March 27, 2016

#CRAFTS WITH ANASTASIA--SPOON PUPPETS

Every so often I like to repeat a favorite post from the past since our readership has grown so much over the last six years. With spring break coming up, these wooden spoon puppets are a perfect afternoon activity for a day when you have nothing else planned. When the puppets are finished, have the children stage a puppet show.

Materials
12” wooden spoon; 6-1/2” x 16” piece of fabric; 3” x 4” flesh-colored felt; 3/4-yd. 1-3/4” wide gathered lace; 4” length of 1” wide gathered lace; 1/2-yd. 1/8” wide satin ribbon; acrylic paint: flesh, dk. flesh, pink and black; acrylic satin varnish; paint brushes; curly doll hair; 4” straw hat; 1” miniature butterfly; paint brushes; tacky glue; low-temp glue gun; graphite paper; pencil; basic sewing supplies

1. Paint spoon bowl, sides of bowl, and approximately 1” of the handle below the bowl with 2 coats flesh paint, allowing paint to dry between coats. 


2. Print out face and hand patterns, enlarging face pattern box to 1-3/4” wide and hand pattern box to 2-1/4” wide.

3. Using graphite paper and pencil, ransfer face pattern to the bowl of the spoon.

4. Paint the mouth pink. To make eyes and freckles, dip the brush handle end into paint and dot eyes in black and freckles in dk. flesh. Allow to dry.

5. Apply 2 coats of satin varnish over painted areas.

6. Sew a length of wide lace to the bottom long edge of the print fabric. Using a 1/4” seam, sew the short ends of the fabric right sides together. Press under remaining long edge 1/4”.

7. To make the dress, run a gathering stitch along the pressed edge of the fabric. Gather tightly around the spoon directly under the bowl. Apply a small amount of tacky glue to hold the fabric to the spoon at the neck.

8. Gather a 6” length of remaining wide lace. Tie tightly around the neck over the gathered fabric for a collar.

9. Gut two hands from the flesh felt. Glue a hand to either side of the dress as shown in photo. Cut the 1” lace in half. Glue each half over a hand to form cuff.

9. Using tacky glue, glue lengths of doll hair to back and edges of spoon.

10. Using the glue gun, glue hat to the back of the head and butterfly to hat brim.

11. Make a bow from the ribbon. Glue to center front of collar. 

Sunday, April 5, 2015

CRAFTS WITH ANASTASIA--MILK CARTON BIRDHOUSE

In honor of Earth Day, coming up on April 22nd, I’m repeating a craft project from the very early days of Killer Crafts & Crafty Killers. Our kids are often the driving force in making us think green. Crafting is a great way for the entire family to enjoy a reuse/repurpose/recycle activity beyond separating the glass, plastic, and newspapers for curbside pick-up. So coax the kids away from the video games and spend an afternoon crafting. 

Milk Carton Birdhouse

Materials:
clean, empty half-gallon milk or juice carton
compass and pencil
hammer and nail
1/8” dowel or twig, 3” - 4” in length
wooden bead to fit dowel or twig
sandpaper
craft knife
weatherproof white acrylic primer
weatherproof acrylic paint in colors of choice
weatherproof acrylic varnish
paintbrushes
tacky glue
scissors
scraps of colored paper
3 spring type clothespins
narrow plastic cording (the kind for making lanyards)
dry pasta, popsicle sticks, buttons, cereal, etc.

Directions:
1.  Lightly sand carton.

2.  Glue the carton closed, holding together with clothespins until glue sets.

3.  With hammer and nail, make two small holes in top flap for hanging loops. (Adult should do this.)

4.  Using compass and pencil, draw a 2-1/4” circle centered approximately 2” above base of carton on one side.  Using craft knife, poke a small hole 3/4” below circle.

5.  Using craft knife, cut out large circle.

6.  Poke dowel or twig through small hole.  Secure by gluing wooden bead onto dowel inside the bird house.

7.  Apply a coat of primer to carton and dowel.  (Twig can be painted or remain unpainted.) Paint in desired colors. Allow to dry between each coat.  (Note: if using roofing materials that require painting, glue them to top of carton before painting.)

8.  Glue dry pasta, popsicle sticks, buttons, cereal, or other materials to top of carton for roof.

9.  Cut shapes from colored paper and glue to sides of birdhouse.  Other materials may also be used (pictures from magazines, stickers, buttons, pasta, ribbon, scraps of wrapping paper, colored yarn dipped in glue, etc. Use your imagination!)

10.  Apply several coats of varnish to entire bird house for protection, allowing to dry between coats.

11.  Thread plastic lacing through holes on top for hanging. 

Sunday, February 22, 2015

#CRAFTS WITH ANASTASIA--GUEST AUTHOR JOANNA CAMPBELL SLAN

paper boat
photo by 
Sergio Fabris
Today we welcome back national bestselling and award-winning author Joanna Campbell Slan who’s got some tips for passing the time indoors while the weather outdoors is frightful. Joanna is the author of the Kiki Lowenstein scrapbooking mystery series and also writes the Cara Mia Delgatto Mysteries, featuring characters who recycle, upcycle, and repurpose items to turn trash into treasure. Learn more about Joanna and her books at her website. 

Crafty Things to Do When the Weather Outside Is Frightful

Snow, snow, snow. The weather report sounds like a broken record. And as I write this, the Boston area is bracing for yet another blizzard-blast, adding more flakes to the growing mountains of white fluff.

I remember those winter days when we couldn't even get out the front door because the snow was piled so high. The smell of diesel wafted over the neighborhood as the husbands vroom-vroomed from behind their snow blowers. While my son would cheer at the words, "Snow day!" I would groan, wondering, "How am I going to keep him busy?"

The same situation occurs in my newest book—Shotgun, Wedding, Bells—and Kiki Lowenstein's children are going crazy. Because Kiki has a criminal to track down, her good friend Laurel Wilkins helps out by babysitting Anya Lowenstein (age 13) and Erik Detweiler (age 5). Laurel is a kid at heart, so she comes up with these terrific ideas for indoor fun:

Snow candy – You need good, clean snow for this. So the badder the weather the gooder the treat! Scoop up enough to fill a cake pan. Stir together 1/4 cup butter to 1 cup maple syrup in a sturdy pot. Bring to a boil, watching constantly. (This is a job for grown-ups, of course!) After it bubbles for six minutes, pour it over the snow. The candy will harden. Once it is cool, break it into pieces and enjoy. Alternately, you can use 1/2 cup honey and 1/4 cup brown sugar for your mix.

Newspaper sailboats – Grab some newspapers out of your recycling bin. Or grab some paper out of your printer. I could explain it, but instead, go here http://www.wikihow.com/Make-a-Paper-Boat and follow the directions! Now fill a bath tub with warm water and sail your boat.

Fashion show – Throw open your closet doors and invite the kids to play dress up. Be sure to take lots and lots of photos.

How will you entertain yourself while the snow piles up outside? I suggest you order a copy of Shotgun, Wedding, Bells. Along with this e-book comes a second e-book, your free copy of Tear Down and Die, the first book in my new Cara Mia Delgatto Mystery Series with 48 five-star reviews on Amazon. As a special bonus, if you send an email to Sally Lippert, my assistant, at SALFL27@att.net , she'll send you a FREE e-copy of Ink, Red, Dead (Book #3 in the Kiki Lowenstein Mystery Series). Meanwhile, stay safe and stay warm!

Shotgun Wedding Bells
In Shotgun, Wedding, Bells, a very pregnant Kiki Lowenstein and her fiancé Detective Chad Detweiler are trying to race the stork to the altar. But their vows are interrupted by a shoot-out. With the help of her nanny, Bronwyn Macavity, Kiki vows to track down the man who ruined her wedding and put her family at risk. Even a big belly bump won’t stop this intrepid amateur sleuth!


Sunday, November 30, 2014

#CRAFTS WITH ANASTASIA--HANDPRINT REINDEER ORNAMENT

Handprint Reindeer Ornament

Last month we showed you how your children could make Handprint Turkey Place Cards for Thanksgiving. Today we put a Christmas spin on the simple arts & crafts project to make Handprint Reindeer Ornaments. Older children will be able to make these ornaments on their own. Younger children will need adult help with some of the cutting.

Materials: small piece of corrugated cardboard, Popsicle stick and brown paint and brush or brown chenille stem, 10mm wiggle eye, 10mm red pompom, 1/2 yd. 1/8” wide green satin ribbon, 1/2” jingle bell, pencil, scissors, tacky glue

1. Using the pencil, trace child’s spread hand on cardboard. Cut out.

2. Cut both ends of Popsicle stick to 1-1/4” lengths. Paint with brown paint. Allow to dry. (Alternate antlers: twist a piece of brown chenille stem to form antlers.) Glue two pieces of Popsicle stick into a “V”, then glue to cardboard as shown in photo.

3. Glue on wiggle eye and pompom as shown.

4. Cut ribbon in half. Thread one piece through jingle bell. Tie into bow. Glue to cardboard as shown.


5. Fold second piece of ribbon in half. Glue to top back for hanging loop.

Sunday, July 20, 2014

CRAFTS WITH ANASTASIA--PAINTED GLASS JARS

Summertime…and the kids are outdoors, splashing in the pool, at the playground, playing sports. Except on those days when they’re stuck in the house due to summer storms and “I’m bored” becomes a common cry. Suggest they read a book during vacation, and many of you will wind up on the receiving end of a “parents are such dorks” eye roll.

Of course, you can allow them to veg out in front of the TV or computer all day, but do you really want your little darlings turning into zombies? Of course not!

So how about a crafts project?

Grab a few empty jars from the recycling bucket and have your kids repurpose them as vases or storage containers. Even though this is a painting craft, it’s one that’s far from messy, no matter how young your child, and it will keep all the kids busy and away from the TV, computer, and their smart phones for at least a few hours. The more glass jars you can scrounge up, the longer they’ll be occupied at something that stimulates their brain cells instead of numbing them.

Materials:
empty glass jars
rubbing alcohol
assorted acrylic paint colors in squirt bottles
clear acrylic sealer
glass paint markers (optional)
paint brush

1. Clean the glass jars with alcohol.
2. Squirt one paint color inside a jar. Allow paint to drip down sides. Let dry.
3. Squirt a second paint color inside the jar. Allow to drip down sides. Let dry.
4. Paint inside of jar with a third color. Allow to dry. Apply a second coat. Allow to dry.
5. Paint inside of jar with clear acrylic sealer.
6. If desired, decorate outside of jar with glass paint markers. 

Sunday, April 20, 2014

Sunday, June 30, 2013

CRAFTS WITH ANASTASIA - CHRISTMAS IN JULY


For those of you who like to get a jump on the holidays but consider yourselves craft challenged, here’s an ornament anyone can make.

Crafty Hoop Ornament

Materials:
3” wooden embroidery hoop, 5” x 5” scrap of Christmas print fabric, 12” length 1” wide gathered lace, 7” length 1/4” wide ribbon, tacky glue, scissors

1. Place fabric in hoop. Trim excess fabric even with back of hoop.

2. Glue gathered lace around back edge of hoop.

3. Fold ribbon in half and glue cut ends to top back of hoop for hanging loop.

Could it get any easier?

Sunday, December 2, 2012

CRAFTS WITH ANASTASIA - CHRISTMAS TREE WREATH


Christmas Tree Wreath

This wreath can be a family project as long as kids are well supervised.

Materials: 10” Styrofoam® wreath, 1/4 yd. red fabric, sequin pins, 2” x 3” piece of cardboard, scraps of felt in assorted shades of green, 6 craft sticks, brown acryllic paint and paint brush or wide brown marker, 5mm and 7mm round gemstones in assorted colors, tacky glue, jewelry glue, ruler, pencil, scissors, pinking shears (optional.)

1. Cut the craft sticks in half. Paint with brown paint or color with markers. Allow paint to dry.

2. Cut red fabric into 1-1/2” strips. Reserve an 8” length. Wrap wreath, overlapping strips slightly and securing with sequin pins.

3. Mark the midpoint on one 2” side of the cardboard. Draw a line from the each corner of the opposite 2” side to the midpoint. Using the craft knife, cut out the triangle.

4. Using the cardboard triangle as a template, outline 24 triangles on the felt and cut out. If desired, use pinking shears. You’ll need two felt triangles per tree.

5. Using the craft glue, glue two triangles together, sandwiching half a craft stick between the felt pieces with the curved part of the craft stick extending 1” beyond base of triangle.

6. Using the jewelry glue, glue gemstones randomly to trees.

7. Using the tacky glue, glue trees spaced evenly around wreath.

8. Fold the 8” strip of fabric in half, short sides together. Glue ends together. Glue to back of wreath for hanging loop. Secure with sequin pins for added strength.