Featuring guest authors; crafting tips and projects; recipes from food editor and sleuthing sidekick Cloris McWerther; and decorating, travel, fashion, health, beauty, and finance tips from the rest of the American Woman editors.

Note: This site uses Amazon affiliate links. As an Amazon Associate, I earn from qualifying purchases.
Showing posts with label decoupage. Show all posts

Sunday, September 23, 2018

#CRAFTS WITH ANASTASIA--DECOUPAGED AUTUMN CANDLE HOLDER/VASE

Autumn Decoupaged Candle Holder or Vase
This project can be made in any size. Use a larger jar for pillar candles, a smaller one for tea lights. You can also fill the jar with autumn foliage or flowers instead of a candle.

Materials:
Smooth-sided glass jar*
Alcohol
Autumn print fabric
Scissors
Decoupage glue
Foam brush
Rope or twine
Glue gun and glue stick
Raffia

*Note: If using a real candle, choose a glass jar that will withstand heat, and for safety’s sake, omit the raffia tie at the top of the jar. If using an electric candle, any jar will work.

Wipe down the outside of the jar with alcohol to remove any grease or oils from handling.

Cut out the fabric to fit around jar. You can either use a print that works as shown or one where you cut out individual items and use randomly around jar or layer.

Using the foam brush, paint a thin layer of decoupage on the jar. Apply fabric as desired. Paint more decoupage glue over fabric, making sure to smooth out the edges. If layering fabric, apply decoupage glue to each layer.

Using the glue gun, adhere rope or twine to bottom of jar, wrapping around jar two or three times.

Cut several lengths of raffia and tie in a bow at top of jar. Use your fingers.  It helps when trying to mold the leaf around the jar.

Find more decoupage crafts in Decoupage Can Be Deadly, book 4 of the Anastasia Pollack Crafting Mysteries.

Decoupage Can Be Deadly
An Anastasia Pollack Crafting Mystery, Book 4

Anastasia and her fellow American Woman editors are steaming mad when minutes before the opening of a consumer show, they discover half their booth usurped by Bling!, their publisher’s newest magazine. CEO Alfred Gruenwald is sporting new arm candy—rapper-turned-entrepreneur and Bling! executive editor, the first-name-only Philomena. During the consumer show, Gruenwald’s wife serves Philomena with an alienation of affection lawsuit, but Philomena doesn’t live long enough to make an appearance in court. She’s found dead days later, stuffed in the shipping case that held Anastasia’s decoupage crafts. When Gruenwald makes cash-strapped Anastasia an offer she can’t refuse, she wonders, does he really want to find Philomena’s killer or is he harboring a hidden agenda?

Buy Links
Kobo 
Nook 

Thursday, November 21, 2013

BOOK CLUB FRIDAY--AUTHOR LOIS WINSTON

It's always exciting to be able to announce the arrival of a new Anastasia Pollack Crafting Mystery. Author Lois Winston (she who writes those books featuring yours truly) is here today to talk about the latest trouble she's gotten me into. Of course I'm biased, but I think it's the best one yet.

Award-winning author Lois Winston writes the critically acclaimed Anastasia Pollack Crafting Mystery series featuring magazine crafts editor and reluctant amateur sleuth Anastasia Pollack. Lois is also published in women’s fiction, romance, romantic suspense, and non-fiction under her own name and her Emma Carlyle pen name. Visit her at www.loiswinston.com.--Anastasia 


There’s a trend in historical fiction to incorporate real people—both famous and infamous—into plots. Sometimes these characters are secondary to the story; other times they play an integral role in the narrative. The first book I ever came across to do this was E.L. Doctorow’s Ragtime. Great book! Great musical! I highly recommend both.

In contemporary fiction most authors shy away from using real people for fear of lawsuits, limiting references to such things as making comparisons about a character’s resemblance to a celebrity. It’s a great way to create a visual image without sticking a paragraph of boring head-to-toe description into a scene. In the Anastasia Pollack Crafting Mystery series I’ve described Zack Barnes, Anastasia’s love interest, as “a guy who looks like Pierce Brosnan, George Clooney, Patrick Dempsey, and Antonio Bandares all contributed to his gene pool.” I don’t think I have to worry about receiving letters from any of their attorneys.

However, because Anastasia is a crafts editor for a women’s magazine, I’m always on the lookout for new trends, both in crafts and in pop culture in general, to incorporate into my novels—in other words, the kind of things you’d find featured in the magazines for sale at the supermarket checkout. Sometimes I hit pay dirt.

Such was the case when I learned of the recent fad of Vajazzling. Here was something not only crafty but both fashion and beauty-related. It ticked off three of the monthly features showcased at the magazine where Anastasia works. Although, note that I chose to showcase the craft of decoupage and not Vajazzling in the title. Decoupage is also the craft that I’ve included for projects in the book. Want to know why? Read the first chapter over at my website.
  
Decoupage Can Be Deadly
Anastasia and her fellow American Woman editors are steaming mad when minutes before the opening of a consumer show, they discover half their booth usurped by Bling!, their publisher’s newest magazine. CEO Alfred Gruenwald is sporting new arm candy—rapper-turned-entrepreneur and Bling! executive editor, the first-name-only Philomena. During the consumer show, Gruenwald’s wife serves Philomena with an alienation of affection lawsuit, but Philomena doesn’t live long enough to make an appearance in court. She’s found dead days later, stuffed in the shipping case that held Anastasia’s decoupage crafts. When Gruenwald makes cash-strapped Anastasia an offer she can’t refuse, she wonders, does he really want to find Philomena’s killer or is he harboring a hidden agenda?

Decoupage Can Be Deadly is now available in both print and as an ebook. Print copies can be purchased through Amazon or ordered from any bookseller. Ebooks are available from the following vendors:

Nook 
Kobo 

Monday, March 11, 2013

CRAFTS WITH ANASTASIA - DECOUPAGED EASTER PHOTO ALBUM


Many people take family photos at Easter. Why not create an Easter album for all of those photos you’ve collected over the years? I used images from a Victorian themed calendar I’d saved. You might want to use greeting cards you’ve collected over the years. You can also download images, but if you do, be sure to use a laser printer. The ink from inkjet printers will smear when you apply the decoupage medium.

Decoupaged Easter Photo Album

Materials: photo album (any size), Easter artwork from greeting cards or calendars, craft stick (optional,) foam brush, scissors, découpage medium, tweezers (optional.)

Directions:
1. Cut out desired images from artwork. Arrange on photo album cover.

2. Working one cut-out at a time and using the foam brush, apply decoupage medium to the wrong side of the artwork.

3. Position artwork on the album, using the tweezers to aid in placement if desired.

4. Eliminate wrinkles, air bubbles, and excess medium by gently pushing down on the cut-out with your fingers or the craft stick, working from the center outward. Remove any excess medium with a damp cloth.

5. Apply the next cut-out in the same manner. Repeat until all images are adhered to the album.

6. Allow decoupage to dry completely. Once dry, apply several coats of découpage medium to the entire surface, allowing each coat to dry completely before applying the next coat.

Sunday, November 11, 2012

CRAFTS WITH ANASTASIA - PATCHWORK VASE


Patchwork Vase

Make a series of these to run down the middle of a dining room table for a unique centerpiece. Choose colors to coordinate with your decor or for each holiday. The sample was made from a 9.5 oz. coffee drink bottle, but you can use any size or shape bottle.

Materials:
glass bottle with smooth surface
rubbing alcohol
assorted small print cotton or cotton blend fabric scraps
pinking shears
decoupage medium
foam brush
raffia

1. Clean glass with alcohol.

2. Cut fabric into squares and rectangles ranging between 1” – 2”

3. Apply decoupage medium to back of fabric square and adhere to glass. Smooth out any wrinkles and bubbles with fingers. Continue applying fabric randomly, overlapping slightly, until entire surface is covered. Be sure to wrap fabric around to inside of bottle and bottom edge. Allow decoupage medium to dry.

4. Apply a coat of decoupage medium over entire surface of bottle.

5. Tie raffia around bottle neck.

Sunday, August 26, 2012

CRAFTS WITH ANASTASIA - MAP DÉCOUPAGED PICTURE FRAME

Zoe at Liberty State Park

       
Summer vacation is either over or just about over for most of the country. If you're like me, you probably took lots of photos while on vacation. Instead of hiding them all away in a photo album, here's a great, easy craft to keep the memories fresh all year long.

Map Decoupaged Picture Frame

Materials: wooden picture frame, road map, craft stick (optional,) foam brush, scissors, découpage medium, tweezers (optional.)

Directions:
1. Cut out sections of the map into manageable pieces, about 3" - 4" in length and wide enough to wrap around the frame.

2. Using the foam brush, apply découpage medium to the wrong side of the map cut-outs.

3. Position a map cut-out on the frame, wrapping around to the inside and outside so that all exposed sections of the wooden frame are covered. Use the tweezers to aid in placement.

4. Eliminate wrinkles, air bubbles, and excess medium by gently pushing down on the cut-out with your fingers or the craft stick, working from the center outward. Remove any excess medium with a damp cloth.

5. Glue the next section of map onto the frame, overlapping the first piece slightly. Repeat until entire frame is covered.

6. Allow decoupage to dry completely. Once dry, apply several coats of découpage medium to the entire surface, allowing each coat to dry completely before applying the next coat.

Sunday, June 10, 2012

CRAFTS WITH ANASTASIA - YARN DECOUPAGE


School is either already out or about to end. If you’re not a member of the 1% and have the luxury of sending your kids off to summer camp, followed by a family vacation before the start of school in late August/early September, you’re going to be looking for things for them to do. Outdoor activities are great, especially if your community has a swimming pool, but what do you do when those summer rains hit and you don’t want your kids playing video games 24/7? Think crafts! And to help you out, I’m going to feature lots of kid-friendly projects over the next few months. So stock up on some basic crafting supplies, and have fun.

YARN DECOUPAGE

Materials: jars, bottles, and cans in various sizes; scraps of colored or variegated yarn; rubbing alcohol (optional); white acrylic primer (optional); decoupage medium; foam brush

1. If using a glass item, clean the surface with rubbing alcohol. If using a can with images on it, apply a coat of primer and allow to dry completely.

2. Working from the bottom up, apply a coat of decoupage medium to the surface of the container. Wrap yarn tightly around the jar or can. Don’t leave any gaps between the rows of yarn. Working an inch or two at a time will keep the decoupage medium from drying before you finish wrapping the yarn.

3. If using multiple yarns, make sure you begin the next piece where you previous one ended.

4. Once the entire container is wrapped and completely dry, apply a layer of decoupage medium to the yarn.

Option: create dimension by adding additional layers of yarn on over the first layer at different points on the container.

Sunday, May 20, 2012

CRAFTS WITH ANASTASIA-- POTICHOMANIE DECOUPAGE


Last week I showed you how to decoupage a bottle with tissue paper. Today we have another technique combining decoupage and glass. Potichomanie Decoupage is a technique that originated in Victorian England when Chinese vases were very popular. For those who couldn’t afford to buy a Chinese vase, this craft technique created a DIY variation.


Materials:
wide-mouthed glass jar
alcohol
print that fits inside the jar
1” wide foam brush
DecoArt Americana matte Decou-Page medium
DecoArt Americana acrylic paint in color to complement print

1. Soak jar or bottle in warm water to remove the label. Clean inside of jar with alcohol.

2. Carefully cut out the print.

3. Apply Decou-Page to the face of the print.

4. Place the print inside the jar. Press the print to mold it to the contour of the jar, working from center of print outward to smooth wrinkles and remove air bubbles. Allow to dry thoroughly.

5. Apply a coat of Decou-Page to the inside of the jar. Allow to dry.

5. Paint interior surface of jar

Sunday, April 29, 2012

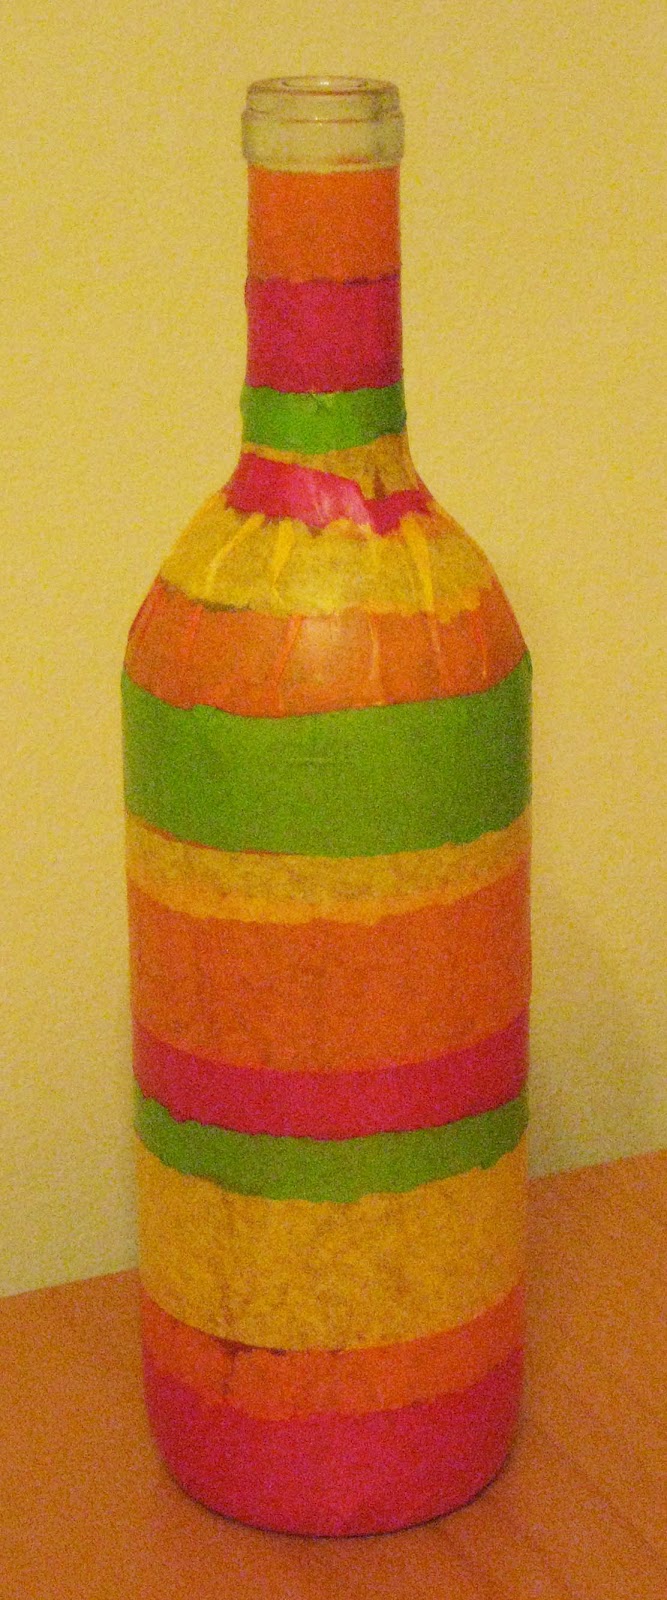
CRAFTS WITH ANASTASIA-- TISSUE PAPER DECOUPAGED BOTTLE

Most of us recycle our used wine bottles, spaghetti jars, and jam jars, but have you ever thought of repurposing them? Why not? It’s easy and fun. Here’s one idea for turning glass items from the recycling bin into bright spring vases.

Materials:
glass wine bottle
alcohol
tape measure
ruler
assorted colors tissue paper
1” wide foam brush
DecoArt Americana matte Decou-Page medium


1. Soak jar or bottle in warm water to remove the label. Clean glass with alcohol.

2. Measure the circumference of the bottle. Tear strips of tissue paper in varying widths and the length of the circumference.

3. Apply Decou-Page around the bottom of the bottle. Lay a strip of tissue paper over Decou-Page, gently smoothing the paper to remove as many wrinkles and air bubbles as possible. (Note: some wrinkling will be unavoidable. Don’t worry. The wrinkles add character.)

4. Continue working from the bottom up, gluing tissue paper around bottle, overlapping the edges slightly, until entire bottle is covered. Allow Decou-page to dry.

5. Apply several coats of Decou-Page to the bottle, allowing coats to dry in-between.

Sunday, November 27, 2011

CRAFTS WITH ANASTASIA-- FAUX FINISHED BOX

When it comes to crafts, I’m all about transforming the ordinary into the extraordinary. Simple, inexpensive items can become elegant accessories with nothing more than a bit of time and a few common craft supplies. No talent required.

Today’s craft project is a faux finished box you’ll want to keep out on display year round. The box itself can be used to store just about anything, depending on the size you use. After all, who can’t use another storage container, right? Or use it as a container for a centerpiece. In and of itself it makes an elegant gift, but when used as a gift box, the recipient receives two gifts in one.

Materials:
chipwood box (your choice of size and style)

DecoArt walnut Americana water-based stain

DecoArt Dazzling Metallics Elegant Finish acrylic paint, Splendid Gold and Rich Espresso

DecoArt Satin Varnish

foam brush

rag

plastic lids to use as paint trays

household sponge

paper towels

3/4” wide ecru decorative lace trim, length determined by perimeter of lid and container

DecoArt American matte Decou-Page

1. Brush stain onto box and lid. While still wet, wipe off excess with rag.

2. Cut a piece of sponge approximately 1” x 2”. Wet sponge. Wring out excess water.

3. Place a small amount of the Splendid Gold paint in a tray. Dip an edge of the sponge into the paint. Tamp off excess paint on paper towel. Then randomly tamp onto box and lid.

4. Repeat Step 3 with Rich Espresso paint.

5. When paint is completely dry, brush on a coat of Satin Varnish.

6. Using the Decou-page, decoupage lace around lip of lid and base of box.

Want to line your box? It’s easy with some felt and tack glue. Measure the inside circumference of the box and the height. Cut a piece of felt to these dimensions. Place the box on a second piece of felt and trace around the bottom edge. Cut out this piece 1/16” inside the traced line.

Glue the side piece to the inside of the box. Fit the bottom piece into the box. If it’s a bit tight, trim to fit. Glue in place.


Anyone going to try this craft? Post a comment to enter the drawing for a book from our Book Club Friday guest author. -- AP